

C:\Users\sri\Downloads>pscp -i “C:\Users\sri\Documents\pemfiles\SriPrivateKey.ppk” “MyFile.zip” ec2-sri@3.214.175.30:/home/sri/MyFile.zip
About
Sri is a Senior Cloud / DevSecOps Architect with 20+ years of IT experience, including 8+ years specializing in AWS Cloud/GovCloud and DevSecOps. Expert in designing secure, scalable cloud solutions, optimizing CI/CD pipelines, and aligning architecture with business goals for continuous improvement. Strong advocate of a "security-first" mindset, leveraging expertise in cloud-native architectures, Linux/Windows/Mac operating systems, and cloud security best practices to enhance efficiency and protect critical systems. Extensive hands-on experience in both on-premises and cloud environments, with multi-vendor bare-metal and virtualized systems to build resilient, highly available infrastructures. Proven in designing and managing complex environments with a focus on automated security, continuous monitoring, and proactive risk mitigation.
- Current location: Virginia, USA
- Expertise: DevSecOps and Cloud
Skills
DevSecOps
Jenkins, Ansible, Docker, Kubernetes, Podman, Zabbix, Sonarqube, Sonatype Nexus, Mattermost, Microsoft Teams, Slack, CloudWatch, ELK Stack, Graphana, Splunk
Cloud
Amazon AWS EC2, VPC, EBS, AMI, SNS, S3, Glacier, CloudFormation, Application Load Balancer (ALB), Auto Scaling Group, Route 53, Elastic Container Service, Lambda, IAM, Systems Manager, CloudTrail, EFS, RDS
Frontend / Backend Applications
Apache, Nginx, IIS, HTTP, HTTPS, HTML and CSS, JavaScript, Angular JS, Node JS, XML, Maven, Bash Shell Script, Python, Java, Xcode, iOS, Objective-C, Swift, ActiveMQ
Database / Reporting Tools
MySQL, MariaDB, Amzaon Aurora RDS,PostgreSQL, MongoDB, MarkLogic, Talend, Tableau, Document DB, DynamoDB
Security
Kali Linux, Nikto, Metasploit, Burp Suite, OWASP Nmap, Wireshark, CloudTrail, CloudWatch, Group Policy, Security Groups, IAM, GuardDuty, WAF & Shield, System Galaxy Access Control, Sonarqube
Operating Systems
Red Hat Linux 4.x/5.x/6.x/7.0/8.0, Centos 5.x/6.x/7.0/8.0, Ubuntu 16/17/18, Windows NT/2008/2012/2016 Servers
sudo groupadd app1users
sudo useradd sri
sudo usermod -aG app1users sri
sudo su - sri
mkdir .ssh
touch .ssh/authorized_keys
chmod 700 .ssh
chmod 600 .ssh/authorized_keys
vi .ssh/authorized_keys
### create a key pair using ssh-keygen or Puttygen ###
### Save the content of .pub public key to .ssh/authorized_keys file ###
exit
### Login to server using newly created user account ###
Download and install Putty and Puttygen using Putty Windows MSI Installer package using following link:
https://www.chiark.greenend.org.uk/~sgtatham/putty/latest.html
Note: PuTTYgen is normally installed as part of the normal PuTTY .msi package installation. There is no need for a separate PuTTYgen download.
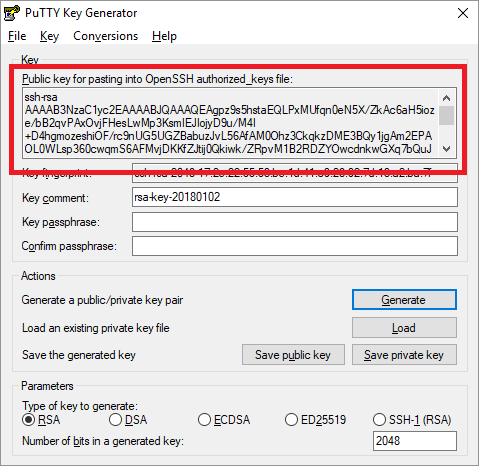
- Open PuttyGen and click on Generate button
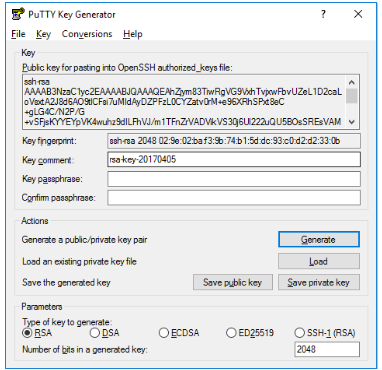
Start moving the mouse within the Window. Putty uses mouse movements to collect randomness. The exact way you are going to move your mouse cannot be predicted by an external attacker. You may need to move the mouse for some time, depending on the size of your key. As you move it, the green progress bar should advance. Once the progress bar becomes full, the actual key generation computation takes place. This may take from several seconds to several minutes. When complete, the public key should appear in the Window. You can now specify a passphrase for the key.
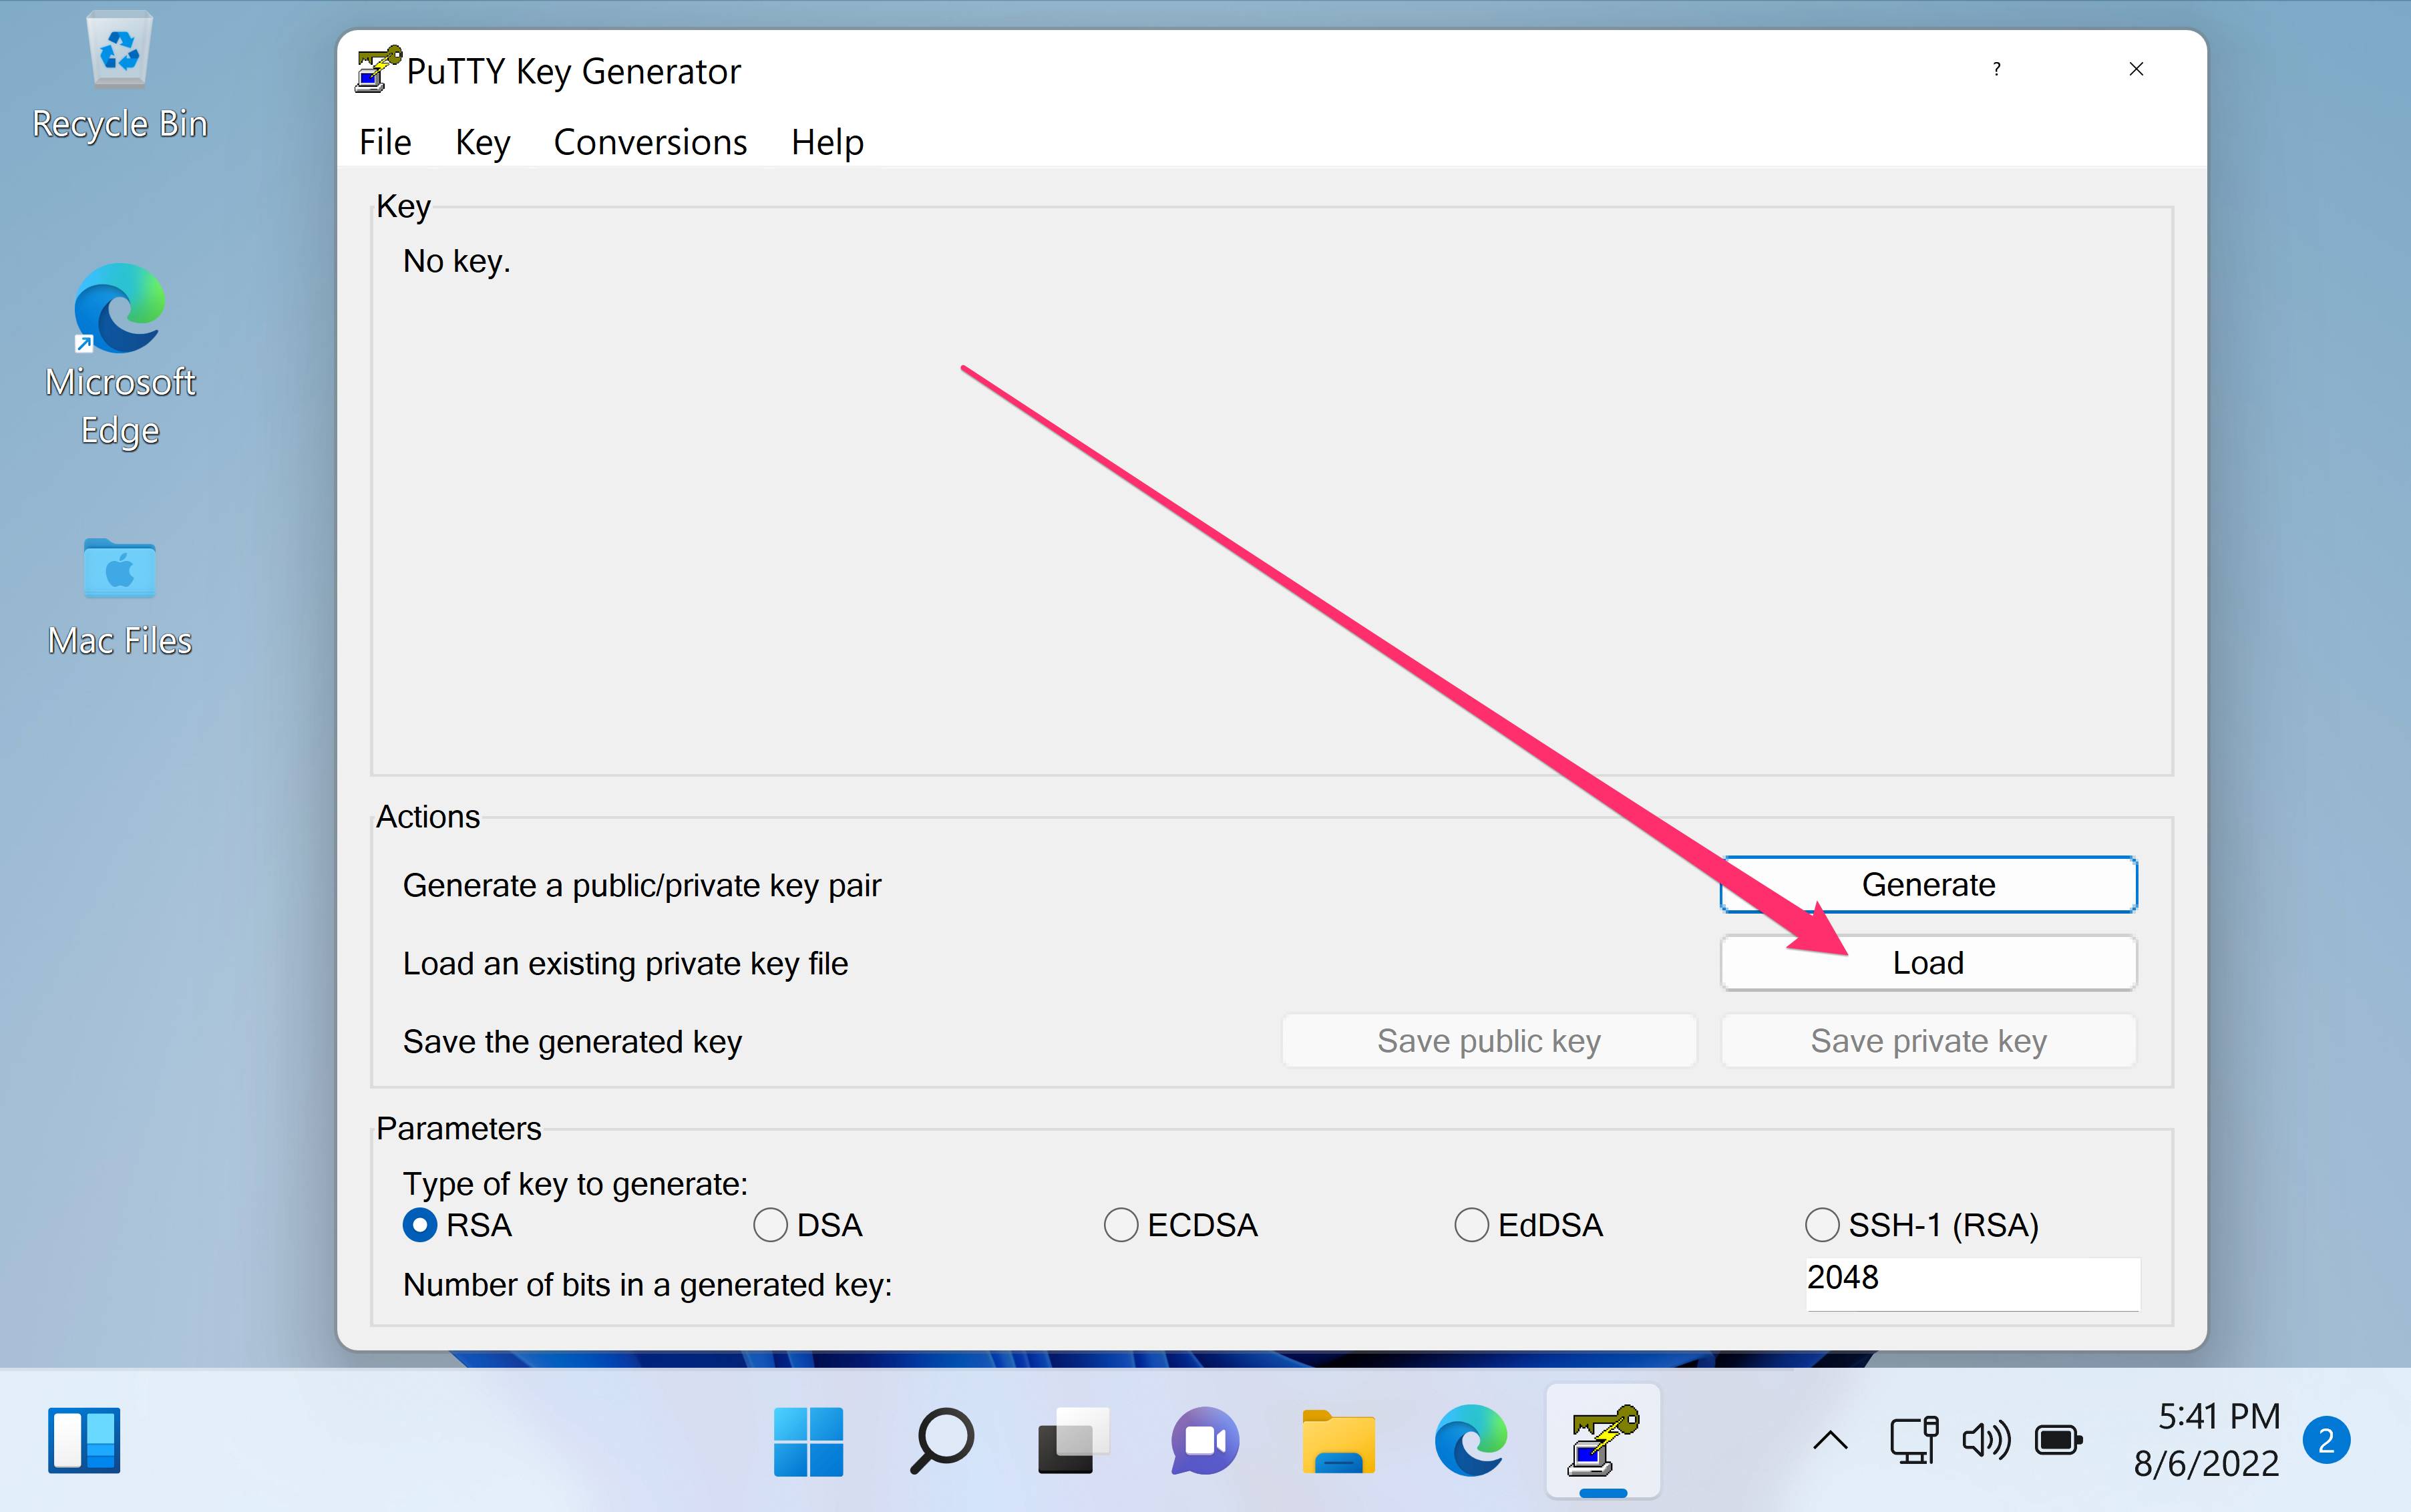
You should save at least the private key by clicking Save private key button. It may be advisable to also save the public key, though it can be later regenerated by loading the private key (by clicking Load).
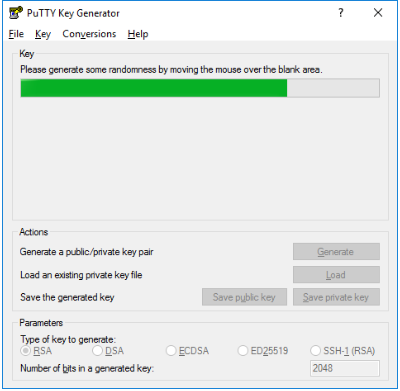
- Copy and paste public key from Key window to .ssh/authorized_keys file in remote linux server
- Open PuttyGen and click on Load button
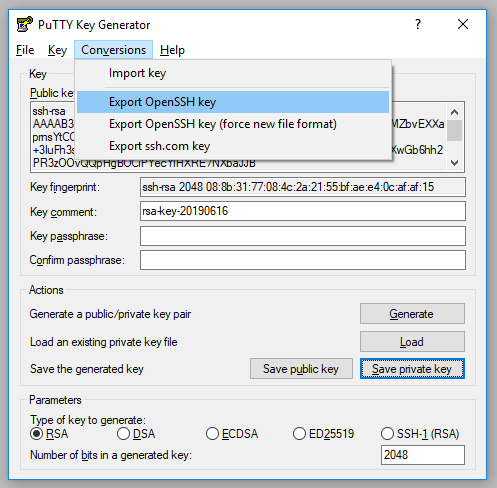
- Click on Conversions menu and select Export OpenSSH key
- Enter and confirm a password for new Passphrase or Click on Yes if you don't want to use any password
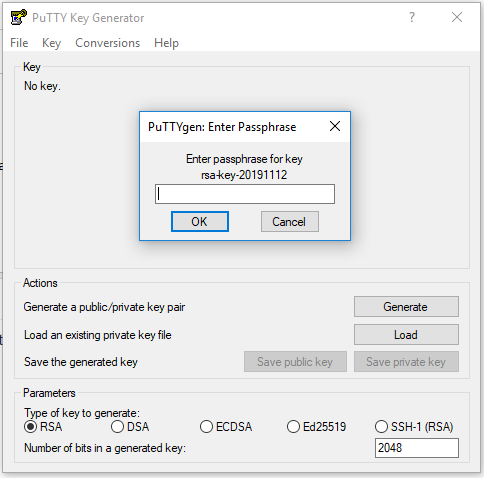
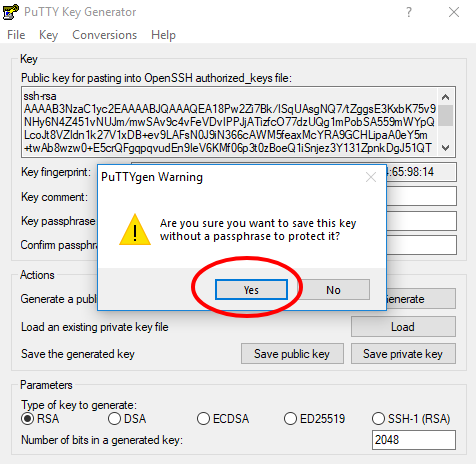
- Click on Save private key button
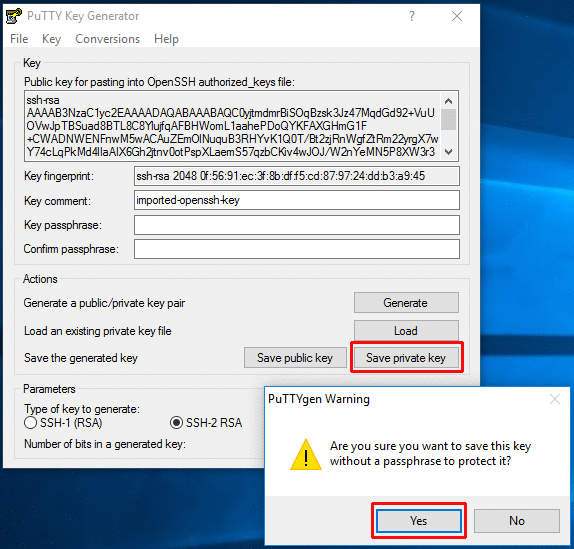
- Choose All Files (*.*) from drop down menu and enter a new file name with .pem extension
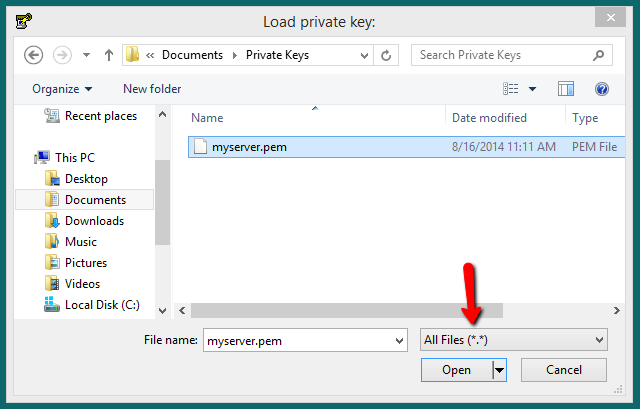
- Copy public key content from Key box and paste it into .ssh/authorized_keys file in remote server
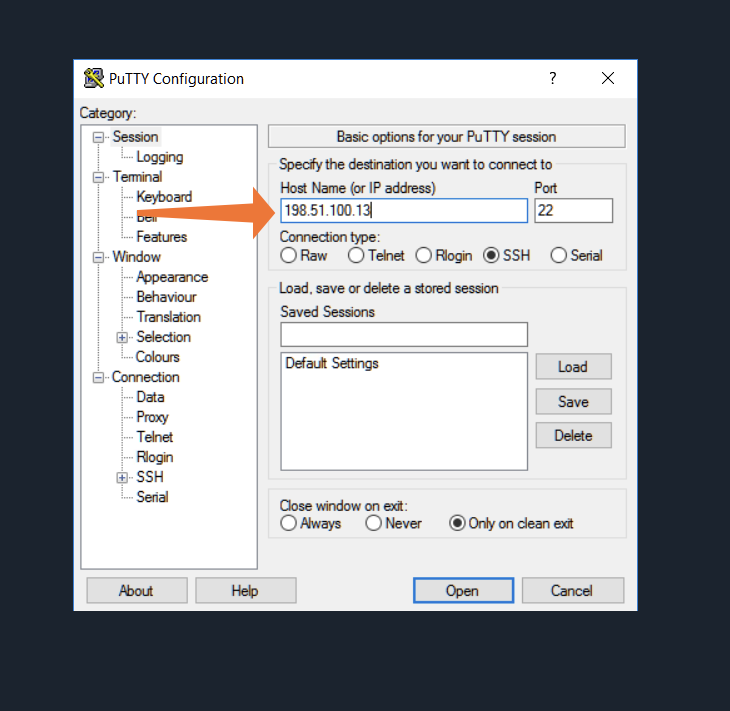
- Open Putty
- Enter Host Name (or IP address)
- Click on SSH, Auth from Connection tab inside Category option
- Browse and select Private Key (.ppk) file
- Click on Open to connect to the server
- Give correct user name and connect
sudo yum install java-1-8.0-openjdk
java -version